How to Create an Azure Key Vault to Store Secrets
Learn how to create an Azure Key Vault to securely store secrets and passphrases for your Azure infrastructure.
In my earlier post, I demonstrated how to back up my Windows 11 PC's files using Azure Backup. Now, I am going to review how to create an Azure Key Vault to store that passphrase more safely and securely.
Prerequisites
-
An existing Azure subscription
-
A passphrase to save
Step 1: Create the Azure Key Vault
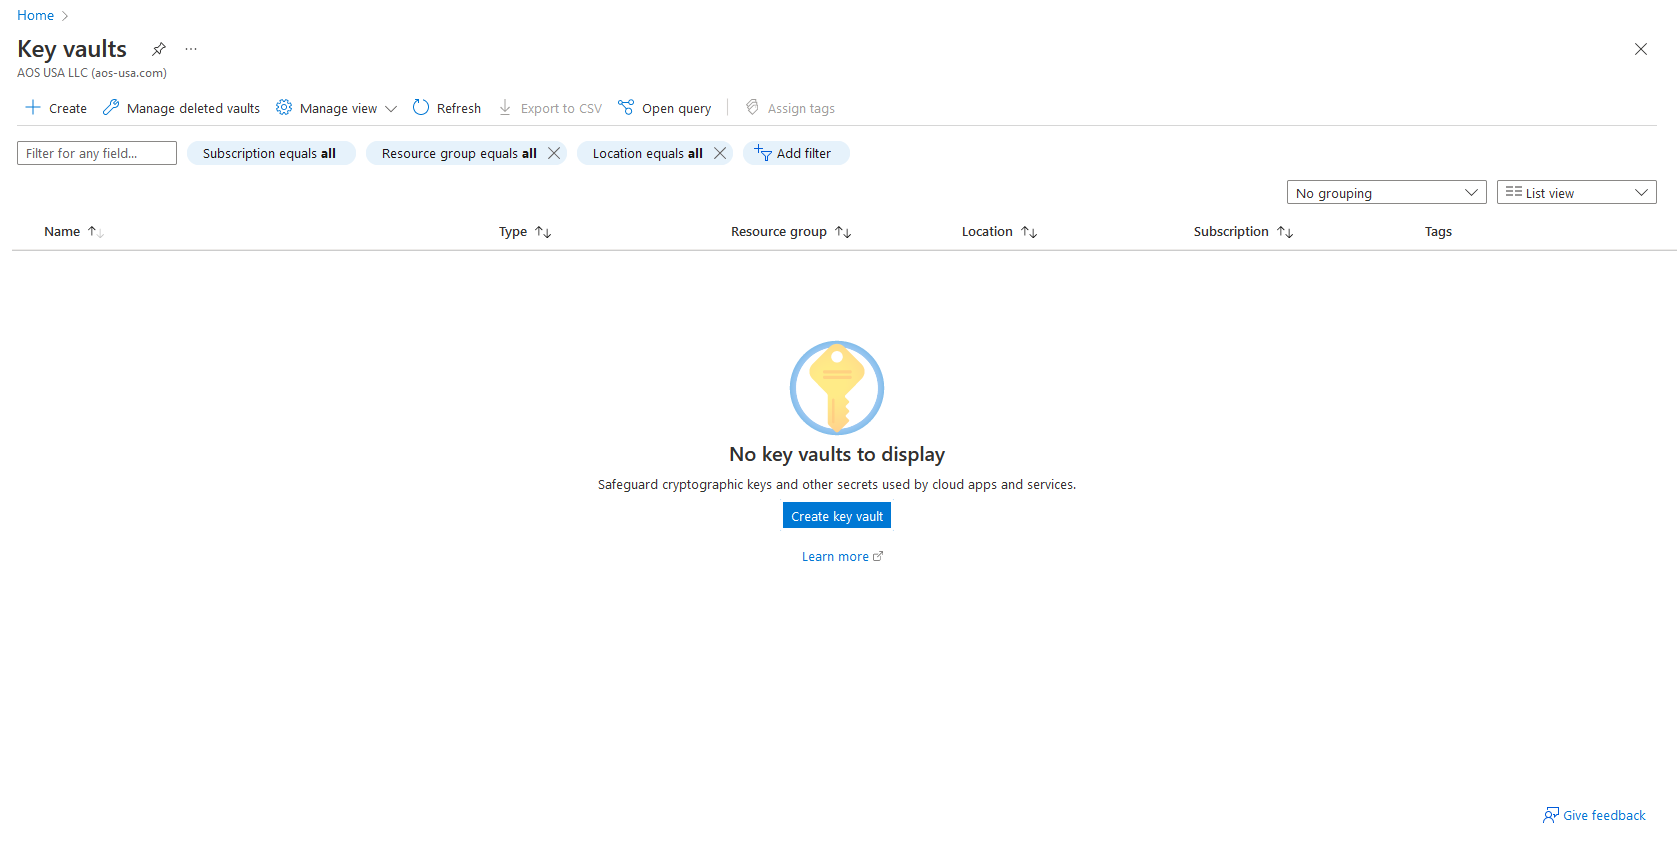
To create a key vault, you must log in to the Azure portal and search for "key vault". Once done, you will see the above screen. Click "Create Key Vault" to continue.
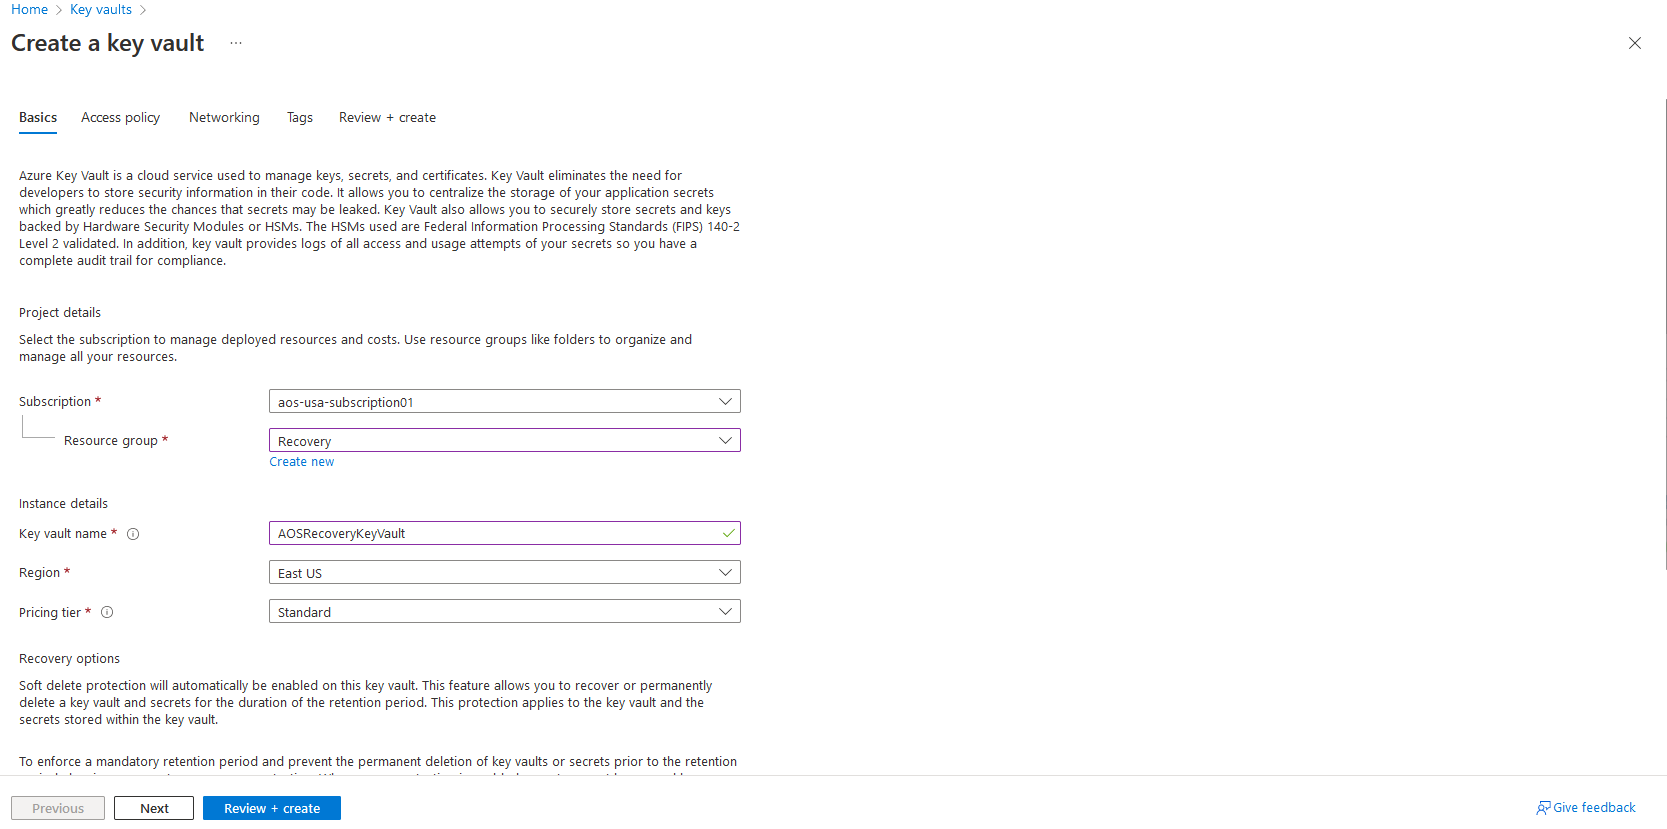
In the above screen, you are asked to choose a resource group or create one. Again, in this case, I chose to create a new resource group. Then you are asked to create a unique key vault name and choose a region, and pricing tier. I chose the East US region and the standard pricing tier. There is no need to use the premium tier in this case. Once your choices are made, click "Review + Create" to create the key vault.
Step 2: Add Secret to Vault
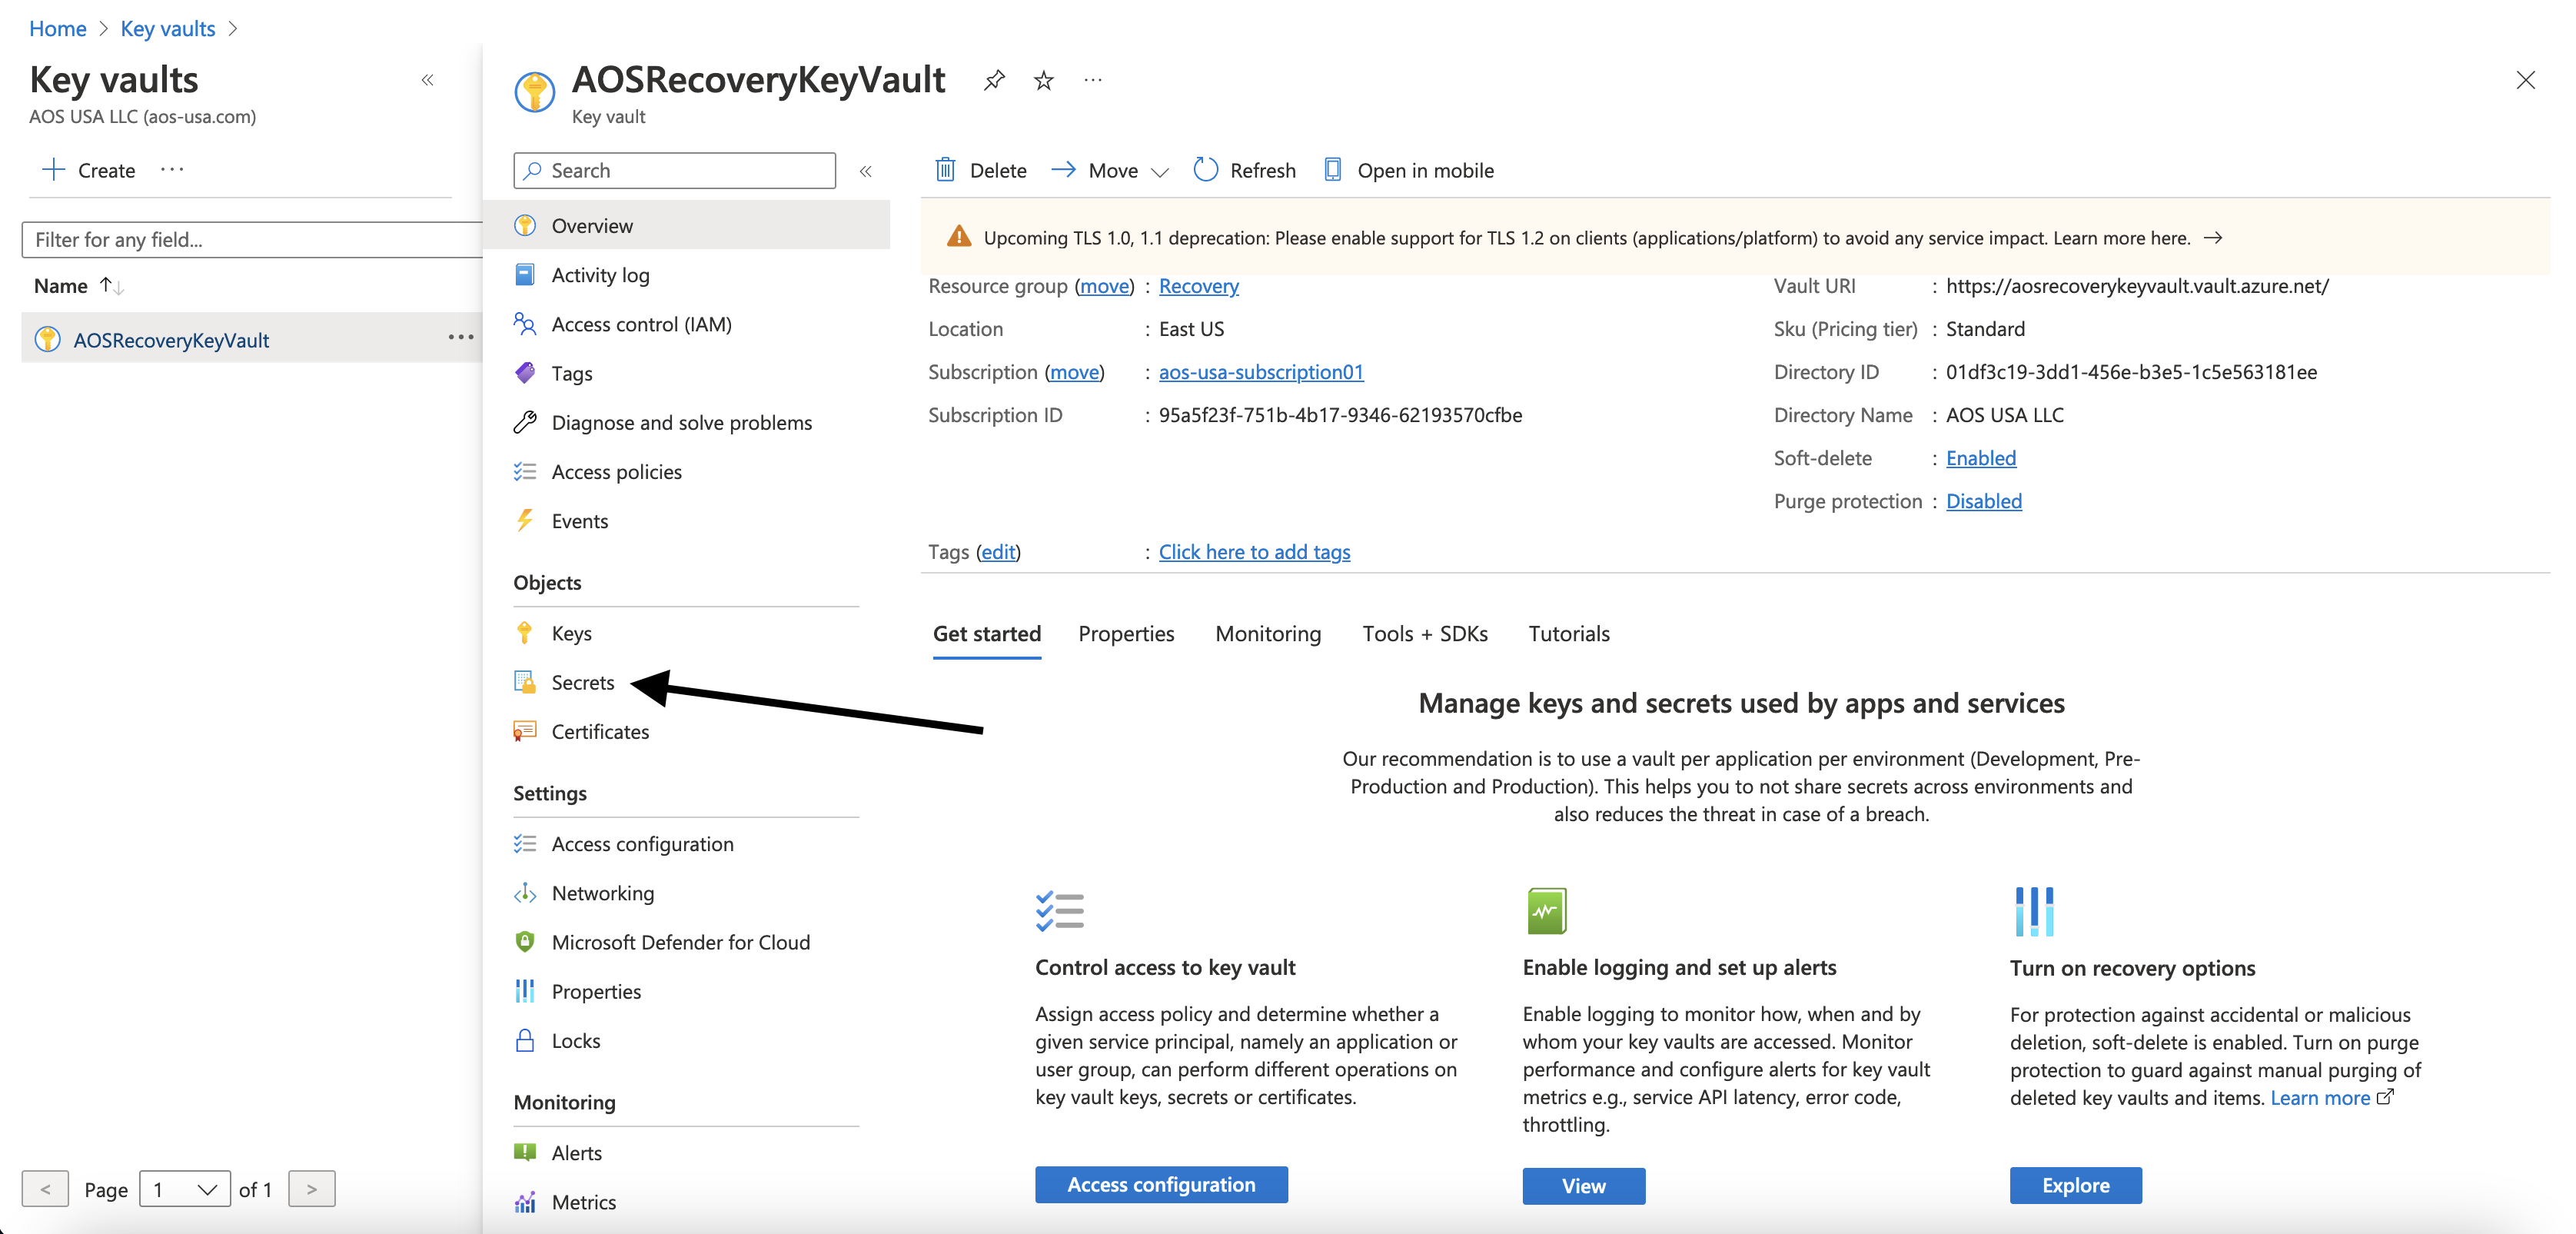
Once the key vault has been deployed, click "Secrets" from the menu on the left side of the screen.
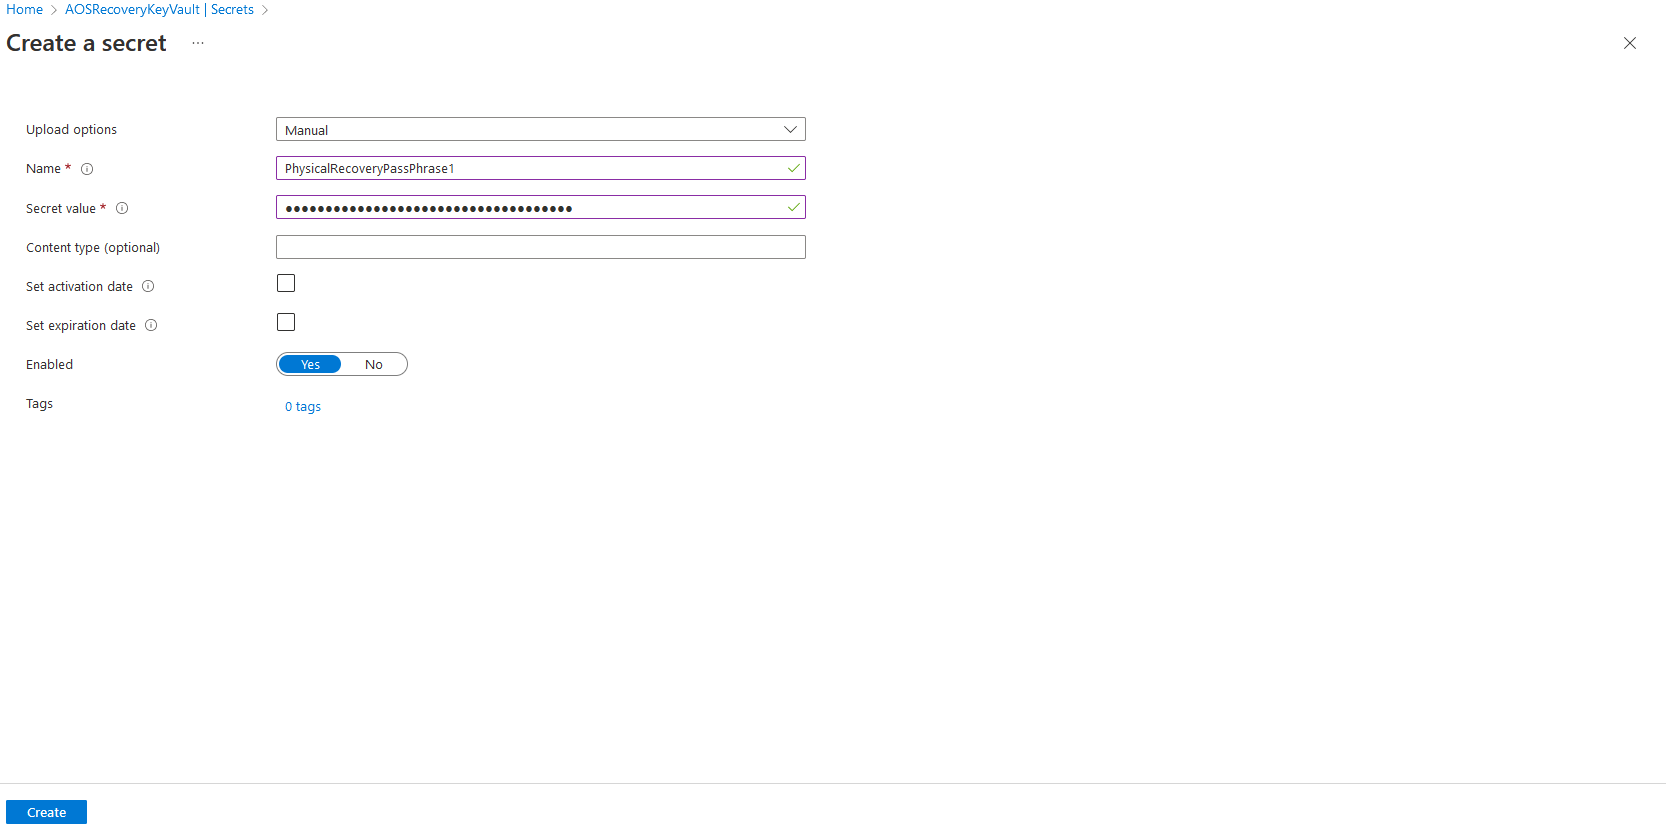
Now you can add the recovery services vault secret (or any secret for that matter) to the Key Vault. Be sure to label it something that makes sense and click "Create"
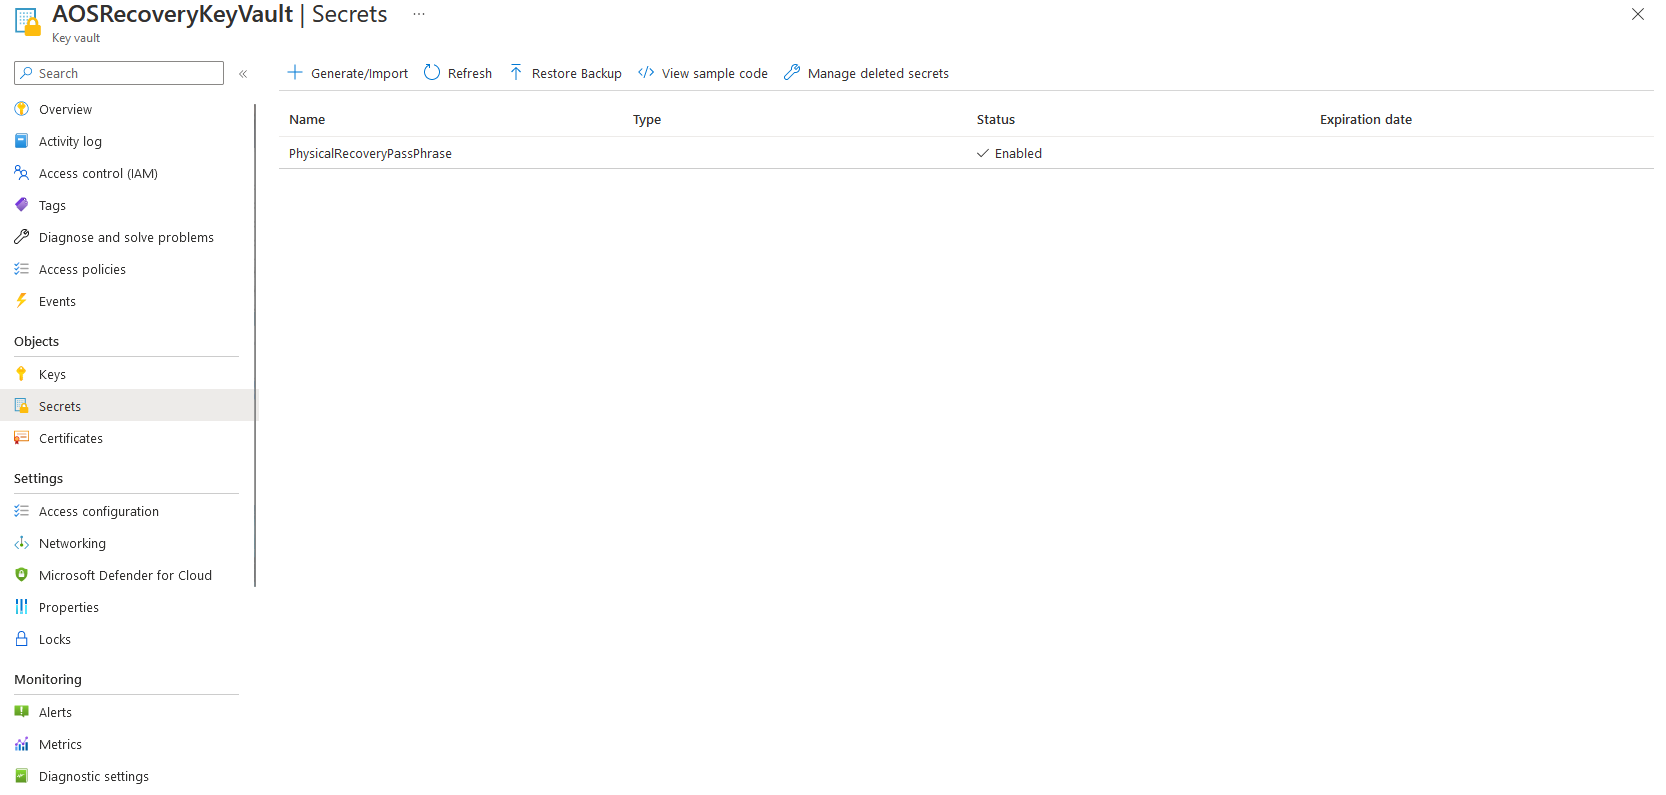
Finally, you should be able to see your secret in the recovery services vault.
Conclusion
This is a really simple way to start working with Azure Key Vault. Now you have your secret saved in a location that is not easily compromised or exposed to failure as your home PC.
Tags: